Tuesday, August 31, 2010

Yarn dying experiment Day #4

I found this great tutorial to dye yarn with food dye which of course is A LOT cheaper! and I love it. I think this will be my Yarn Dying Experiment #2.

http://kathrynivy.com/patterns/extras/dyeing-yarn/

Today I finally was able to put these two babies in a bath. Once is the long skein I rewind to make self striping yarn. The other one is the skein I was able to unfold correctly, just the way it comes from Knitpicks.
Skein #1 Long strand for Self Striping yarn
Squeeze bottles with dye


My helper and the final result.


Skein #2 Shorter strand as it comes from Knitpicks.

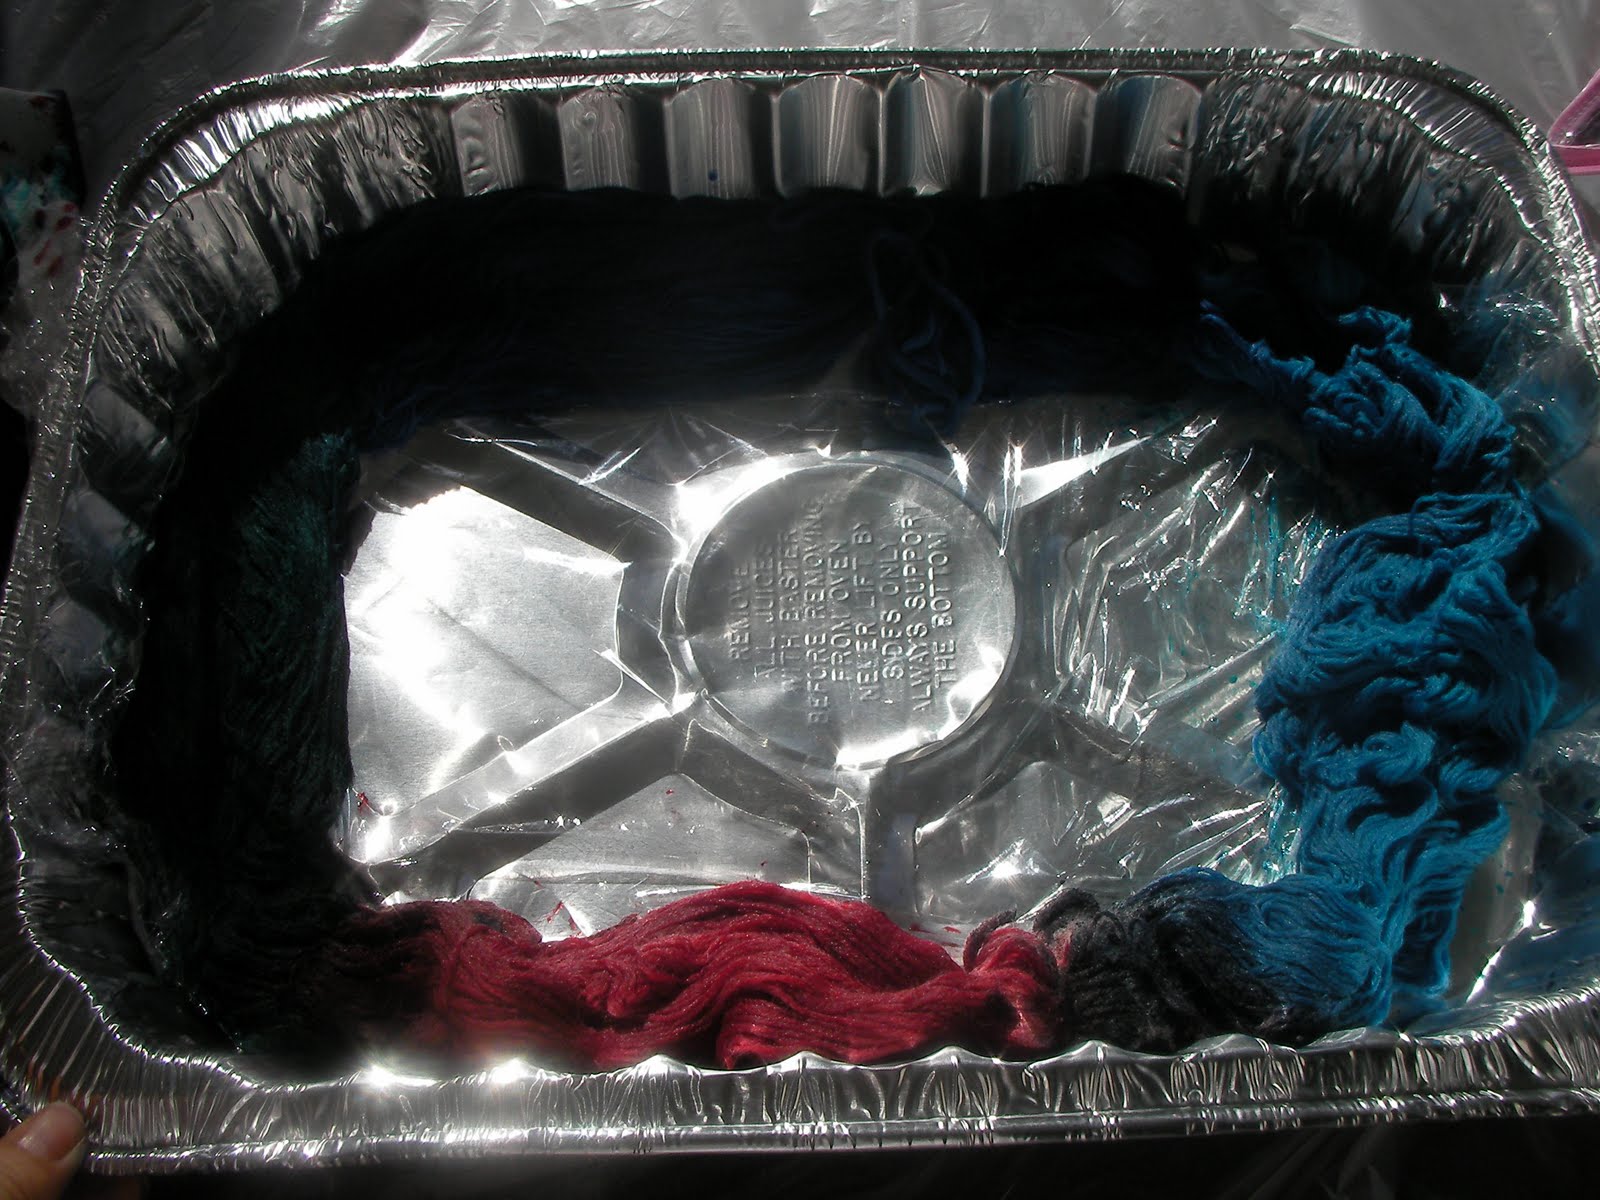
I put it in a foil baking dish and painted it there. I used different colors. This is probably going to come out varigated rather than stripy or with very thin stripes.
I used different colors for the second one. This one has saffyre blue, teal, fire red and tourquoise. I put it in a foil baking dish and painted it there. This is probably going to come out varigated rather than stripy or with very thin stripes because the length of each color is shorter.

The red and the green together created a back stripe but that is OK.


Here are both skeins in the sink cooling off:

Here it is the steaming pot I got from Good Will.I am not sure these were a set, but they fit together perfectly and I even found a lid for it. All for about $5.


I learned a lot from this experience. I learned I need bigger squeeze bottles. I got the kind you use to travel to put shampoo in it. You actually need the bigger kind they use to put Mustard in, otherwise you have to refill them and add vinegar each time. I also need a funnel ( I used paper ice cones) and better globes. The ones I had were so uncomfortable that I ended up not using them at all. I need latex gloves.

Also, it's better to do this without the kids. Rachel helped me at first but on my last skein, Ian distracted me and I forgot to add vinegar... I am not sure how is that going to affect the dying. (after the boiling, this skein bled like crazy and the colors ran into each other probably because of the lack of vinegar but also because of the excess dye because I did not use the squeeze bottles, I just pour the dye from the jar because I was tired... I did gave this a bath in luckewarm water with vinegar after the boiling... Not sure if that helped for the dye to stay, but after that I wash it until the water was clear and it looks OK.)

Another very important thing I learned is to lift the skein after you paint it to check for white spots underneath. I have a big white spot in the first skein :-( but I love the way it came out, I love the colors.

Drying outside:

Yarn Dying Experiment Day #3 (Monday)


Finally finished wrapping the yarn around two chairs to get the length I wanted... Maybe tomorrow I can start having some fun...

And I looked very careful to another hank and this time I was able to figure out how to open it. The hank is folded in half, so you have to unfold it up and then sideways. Huff, finally! I knew I was doing something wrong... It seems so obvious now, I can't believe I went through so much trouble with the other two!!

Yarn Dying Experiment Day #2 (Sunday)

I kept working on detangleling and winding the ball of yarn all day.... the dye is outside calling my name really load!!! I am so tired of doing this...

Time to get out of the house and take the kids to see the ducks at the park or I will kill myself!

Monday, August 30, 2010

Dye experiment -Day 1- (Saturday)

Last Saturday my husband took the kids out and I thought it would be the perfect opportunity to dye some yarn for the first time. The materials have been in my closet for 3 years... waiting patiently for a day like this...

STEP #1 Gather the materials

- Plastic painting blanket to cover the table ($1 at the dollar Store)
- Dust mask ($1 for a dozen at the dollar store)
- Squeeze bottles ($5 at Ride Aid)
- Glass Jars (got at Albertson's so long ago I don't remember the price)
- Measuring teaspoon's ($1 at the dollar store)
- Blank Hank of wool sock yarn (Knitpicks 3 years ago...)
- Jaquard Dyes (Knitpicks 3 years ago)
- White Vinegar ($1 at Fresh and Easy)
- Plastic Wrap ($1 at the Dollar Store)
- Steaming Pot ($5 at Goodwill)
- Globes (that I had at home)

STEP #2

Watch the tutorial video for dying sock blanks again:
http://www.knitpicks.com/tutorials/Sock_Blank_Dyeing__D108.html

The problem is, I don't have a sock blank, I have blank "Bare" skein. But it should work the same, right? right??...

STEP #3

Give the skein an hour bath to absorb water


STEP # 4

The most scary step... mix the dye...


Mix 1/2 teaspoon of dye with one cup of water in each jar. I have hot pink, charchuse, Lilac and Teal.

Each time I switch color I wiped the measuring teaspoon with baby wipes. I discover something, the wippie will reveal to you the final color of the dye... Cool!


STEP #5

Get the yarn out of the water and pad it dry in a towel...

OK, this is where I found a major obstacle in what was supposed to be a fun afternoon dyeing yarn... The wet hank got tangled so bad, it was impossible to open it up or to figure out what was the beginning or the end. It was such a mess, and I got so frustrated that I pulled hard on the ends and made it even worse. Now, there is no use. I don't think I can salvage it. I went upstairs to my room and I grabbed another Knitpicks Bare Hank, this time I open it up BEFORE WASHING IT, very slowly and carefully. This is what I found: There are 2 ties in different sections. I could not figure out how to open those up in neat way for hand dying, but at least I could wind it in a ball. I think I could have just dye it like that if I wanted a varigated effect, but since I wanted stripes, I needed to open up the skein and make a ring with long strands of yarn. Besides after dying I would have to wind it anyways, so might as well do it now. So I began to wind my second skein of yarn:


3 Hours Later:


Time to take a brake... and go to bed very frustrated and tired!