Tuesday, May 28, 2013

Hourglass socks

I have been working on my "Hourglass" socks. I finished one and I am working on the second one.

This is a difficult pattern because it combines lace and twisted stitches, and because in order to execute the pattern, sometimes you have to move stitches from one needle to the other.

I don't think I have worked a harder pattern on a sock before. It will not be a problem if you are an experienced knitter, but if you are just starting to knit socks, this will be a frustrating pattern.

I need to fix the toe on the first sock. I don't like pointy toes.

He estado trabajando en estas medias anaranjadas. Es un patrón bastante complicado. No lo recomendaría para alguien que está empezando a tejer medias. El patrón combina puntadas torcidas con encaje y requiere mover puntadas de una aguja a la otra. Es bastante dificil. Tengo que arreglar los dedos de la primera media porque me quedaron muy puntudos... 


Thursday, May 23, 2013

Hallet's Ledge Neck and button bands

I worked yesterday on the neck of the Hallet's Ledge. I wanted it to be nice and round so I did a K2 x P3 rib for an inch or so and then decrease on RS on the purl sections Purling 2 together across, then did 2 x 2 rib for one row and bind off. It made for a rounded and snug neck. I like it. 

Ayer trabajé en el cuello del sueter Hallet's Ledge. Quería que me quedara bien redondito entonces recogí las puntada elástica de 2 x 3, tejí por una pulgada y luego reduje la parte con 3 puntadas a dos a través de todo el cuello, eso hizo que se recogiera y tomara forma redonda como yo quería. 


Then I worked on the button band. First I did the left side and sew in the buttons I made last Sunday.
They look great!
I noticed it was pulling up at the bottom. I forgot to do a K3 in that area to allow the last row to curl and still have 2 stitches. It was bothering me so, with the same tail from the cast off I did 2 rows of single crochet back and forth. Voila! Problem solved! This is what it looks like now...

Luego hice la banda de los botones y coci los botones que había hecho el domingo. Se ven lindos! Me di cuenta que la banda se subía en la parte de abajo, entonces con una aguja de croché hice dos filas de puntada sencilla y problema resuelto! Así quedó!

Sunday, May 19, 2013

Making buttons with Polymer Clay / Haciendo botones con barro sintético

Today I made polymer clay buttons for the first time. 
Hoy me puse a hacer botones de barro sintético. 

They are for my Hallet's Ledge sweater which is currently blocking.
Son para un sueter que estoy tejiendo.

Here is how I made them: 
Así fue como los hice:

1-) I first play with the clay to make ti soft and created a roll. Then flatted that roll with a dough roller. Bad idea if you want to use that roller for food later on. Once you use it for clay you are not supposed to use it for anything you are going to eat. The rolling is done on a piece of ceramic floor. 
1-) Primero hice un tubo con el barro. Luego lo aplaste con un rodillo. Por cierto que esto no se debe hacer si se quiere usar el rodillo para comida, ya que el barro sintético es tóxico. Para amazarlo use un pedazo de piso de cerámica.  


2-) Then with a cake sprinkle container I shaped the button circles.
2-) Luego use un embase pequeño para crear los círculos.


3-) Using buttons with nice shapes I imprinted the design on the clay. Then with a opened clip I made the holes in the middle. 
3-) Usando botones que tenían bonitos diseños imprimí el diseño en el barro. Luego con un clip abierto, hice los huequitos en el centro. 


I used plastic under the red ones to keep them from sticking to the ceramic square. 
Para los rojos puse plástico abajo para que no me costara despegarlos de la cerámica. 


My kids also had fun making clay figurines. 
Los chicos se divirtieron también haciendo figuritas. 


4-) And off to the oven they go, I baked them according to manufacture's directions for 15 min.
4-) Aquí va todo para el horno, según las instrucciones del barro por 15 minutos.


I made black and red buttons and I still haven't decided which I will use. 
Hice botones negros y rojos y todavía no me decido cuales voy a usar para el sueter. 


 But I am leaning towards the black ones...
 Pero me estoy inclinando hacia los negros...


Wednesday, December 22, 2010

Finishing UFO'S


Our knitting group has a new contest to finish our UFO's. So this is my snapshot of my current Unfinished Projects by antiquity:

#1 Fully Fashioned Ribbed Sweater by Classic Elite This sweater needs to be frogged and so I can reuse the yarn. The sweater looks and fits terrible. The pattern had tons of errors. I finished it in January 2006, and now I am finally ready to rip it off.

#2 4 Seasons Sweater I started this in August 2007. The only reason I know is because I was able to find the entry on my blog. Ravelry didn't exist back then, of if it did, I didn't know about it. Lol

#3 Knit Picks butterfly Socks. I finished this sock about a year ago but I messed up the lace pattern and the sock twists around and fits too tight. It also needs to be ripped.

#4 Newborn Cocoon. Original design that I started in August of this year.

#5 Tomtem Jacket for Ian. Started in October 2010.

#6 Ian's comfy socks. These are finished but I need to rip and re-knit the heel in one of the socks.

#7 Patons Cabled Hoodie. Started Nov 28, 2010

#8 Husband's stripped socks. Started Dec 5, 2010

Now I am debating which one to finish first. The thing that I need the most are Ian's items so I am going to try to finish the socks and the jacket first.

Tuesday, November 09, 2010

Coming clean about my Stash

OK. It is time to come clean and show my stash to the world... Here it is:


When our friend Suzanne invited us to "flash our Stash" on our Ravelry group I didn't imagine it was going to be such an inspiring experience. Actually, I was a little embarrassed to show people how much yarn I had... specially my husband, but he is a good guy and I am sure he will understand when he reads this post... right? Honey?...

I must admit that after taking the pictures I found some more wool in a drawer and there is a bag a Rowan Tweed wool missing in action but I am sure I will find it. Not only this is a great opportunity to reorganize and classify my yarn but it has giving me so much inspiration as to what to knit next. For instance, I was sure I didn't have any aran weight yarn and I discovered that the bags of Elsebeth Lavold Classic Al that I have, are all Aran weight. It is just so true that you put things away and then forget what you have, so in the same way that I try to do laundry and organize my closet before I go shopping for clothes, for now on I will go through my stash before shopping for yarn. :-)

The pictures of the bed show my good brand name yarns.

My acrylics live under the bed here:


And my sock yarn and lace weight live in the closet here:


And of course that is without counting the yarn that I have for sale on Ebay:


I thought about detashing a little but I don't think I could part with any of it...
I love my stash!!!

Sunday, September 26, 2010

Rowan Magazine 46, Bust darts tutorial, Knitting for a child with a cast

Last night my allergies were so bad that I couldn't sleep, even after an overdose with Claritin, I had a horrible night. I got up and started... what else? browsing the internet for knitting patterns.

I decided that I don't want to spend time on Facebook since there is got to be a thousand more productive things to do in life than listening to people's thoughts and complaints. As a result, my head had been spinning with ideas all night and all day today. It is as if I had unlocked a world of creativity and imagination in my head. I even thought of 2 projects to design.

Rowan Magazine
Among other things, I discover the new Rowan magazine# 46, and felt in love with yet, two more patterns for my to do list:


As I was browsing E -bay to see how much the Rowan yarns cost these days, I came across an ebay seller that literally cut off the best pattern of the magazine (the first picture) and was selling it for 1 pound (about a $1,70).

Original magazine pattern, carefully removed, in perfect condition - unused

Now, what would posses somebody to do something like this is beyond me... but one thing is certain, a beautiful $23,95 (plus shipping) Rowan Magazine is now ruined in the futile pursue of $1,78... (plus shipping). Go figure!

Bust Dart Tutorial
I also discovered, thanks to a fellow knitter on Ravelry, the most amazing tutorial on how to add bust darts. I always knew that bust darts were created with short rows, but didn't know exactly how to do it. Well here it is in perfect English! Now, I wasn't looking for this but this link will come in handy for sure!

Knitting for a boy with a cast
My 2 year old will be having hand surgery in January and I want to be prepared. Is is going to be cold and he will have to wear a cast for a few months. We already had the experience last year and I had to cut off one sleeve of all his shirts and I purchased a really cheap hoodie and cut one sleeve as well. This time I want to have a winter wardrobe that can accommodate his cast. I can't think of a better excuse to get to work and KNIT him some items, made to fit. After looking to all of my books and patterns and browsing Ravelry for quite a few hours... I decided on the following projects.

1- Totem Jacket by Elizabeth Zimmerman. This is the perfect Jacket because you knit the body in one piece up to where you want to harm holes and add the sleeves at the end. It is a very simple pattern that allows for plenty of customization. Just what I need to be able to make wider harm holes and sleeves to make space for the cast.


2- This poncho from Drops Designs also fits the bill and can provide the perfect outdoors layer leaving the harms free underneath.


3- A wonderful waistcoat by Debbie Bliss can keep him warm inside or outside the house. And I was thinking maybe I can knit detachable sleeves to it. The pattern is in Classic Knits for Kids; 30 Traditional Aran and Guernsey Designs for 0-6 year olds (1995). This is a really old book and it is out of print but I really want to make it. It still can be ordered from Amazon.com. My scanner broke so I can not provide a picture but is sooo cute!

4- And finally I still may make a lighter weight indoor sweater, which I am debating between EZ's Baby surprise Jacket which has very wide harm holes and this hooded jacket by Debbie Bliss. If I make the last one I will have to modify the harm holes and sleeves to be wider.

All of these patterns (except for the waistcoat), have three things in common; they are very simple, easy to modify and fast to knit. Well I better hurry! I found all the yarn I needed for these projects in my stash. Hurray!!

Thursday, September 16, 2010

Is it possible to fix white spots on a bad dyeing job?

After my yarn was dry there were some white spots in one of the colors, the lilac. I have no idea why this color didn't take, but it was bothering me so I decided to try yet another experiment; fixing one color.
Me di cuenta de que habian quedado unas partes blancas en el color lila.


So off it went the hank of yarn to the sink: Asi que lo heche denuevo en el lavatorio para darle un baño.


And to the counter for retouching with a brush. I had dye left so I used the same bottle of the dye that was already prepared. The color was not covering the white spots, so added some more vinegar, thinking maybe I had forgotten the vinegar... Nothing... So I looked at the solution and it seemed too watery to me so I added more of the dye powder to it... Voila! the dye took this time and covered all the white areas. El tinte no pegaba, me di cuenta de que no tenia suficiente polvo asi que le puse mas y ya funciono...


After that I wrapped the repainted area... Luego la envolvi en plastico.


And finally placed only the repainted part on the steaming pot, leaving the rest of the hank out of the pot. I am not sure this was wise because the dry part of the hank can catch fire on the gas stove if you are not careful. I think next time I will get the whole thing wet and re-steam the whole thing.

The results were perfect and the colors are now even for the most part. The green is not even but at least there are no white spots and I actually like the different shades of green and yellow on it.
Y finalmente puse la parte retocada denuevo en la olla de vapor dejando por fuera la parte seca. La proxima vez creo que la pongo toda dentro de la oya para evitar que prenda fuego con la llama de la estufa.


Before: (antes)


After: (despues)

Tuesday, August 31, 2010

Yarn dying experiment Day #4

I found this great tutorial to dye yarn with food dye which of course is A LOT cheaper! and I love it. I think this will be my Yarn Dying Experiment #2.

http://kathrynivy.com/patterns/extras/dyeing-yarn/

Today I finally was able to put these two babies in a bath. Once is the long skein I rewind to make self striping yarn. The other one is the skein I was able to unfold correctly, just the way it comes from Knitpicks.
Skein #1 Long strand for Self Striping yarn
Squeeze bottles with dye


My helper and the final result.


Skein #2 Shorter strand as it comes from Knitpicks.

I put it in a foil baking dish and painted it there. I used different colors. This is probably going to come out varigated rather than stripy or with very thin stripes.
I used different colors for the second one. This one has saffyre blue, teal, fire red and tourquoise. I put it in a foil baking dish and painted it there. This is probably going to come out varigated rather than stripy or with very thin stripes because the length of each color is shorter.

The red and the green together created a back stripe but that is OK.


Here are both skeins in the sink cooling off:

Here it is the steaming pot I got from Good Will.I am not sure these were a set, but they fit together perfectly and I even found a lid for it. All for about $5.


I learned a lot from this experience. I learned I need bigger squeeze bottles. I got the kind you use to travel to put shampoo in it. You actually need the bigger kind they use to put Mustard in, otherwise you have to refill them and add vinegar each time. I also need a funnel ( I used paper ice cones) and better globes. The ones I had were so uncomfortable that I ended up not using them at all. I need latex gloves.

Also, it's better to do this without the kids. Rachel helped me at first but on my last skein, Ian distracted me and I forgot to add vinegar... I am not sure how is that going to affect the dying. (after the boiling, this skein bled like crazy and the colors ran into each other probably because of the lack of vinegar but also because of the excess dye because I did not use the squeeze bottles, I just pour the dye from the jar because I was tired... I did gave this a bath in luckewarm water with vinegar after the boiling... Not sure if that helped for the dye to stay, but after that I wash it until the water was clear and it looks OK.)

Another very important thing I learned is to lift the skein after you paint it to check for white spots underneath. I have a big white spot in the first skein :-( but I love the way it came out, I love the colors.

Drying outside:

Yarn Dying Experiment Day #3 (Monday)


Finally finished wrapping the yarn around two chairs to get the length I wanted... Maybe tomorrow I can start having some fun...

And I looked very careful to another hank and this time I was able to figure out how to open it. The hank is folded in half, so you have to unfold it up and then sideways. Huff, finally! I knew I was doing something wrong... It seems so obvious now, I can't believe I went through so much trouble with the other two!!

Yarn Dying Experiment Day #2 (Sunday)

I kept working on detangleling and winding the ball of yarn all day.... the dye is outside calling my name really load!!! I am so tired of doing this...

Time to get out of the house and take the kids to see the ducks at the park or I will kill myself!

Monday, August 30, 2010

Dye experiment -Day 1- (Saturday)

Last Saturday my husband took the kids out and I thought it would be the perfect opportunity to dye some yarn for the first time. The materials have been in my closet for 3 years... waiting patiently for a day like this...

STEP #1 Gather the materials

- Plastic painting blanket to cover the table ($1 at the dollar Store)
- Dust mask ($1 for a dozen at the dollar store)
- Squeeze bottles ($5 at Ride Aid)
- Glass Jars (got at Albertson's so long ago I don't remember the price)
- Measuring teaspoon's ($1 at the dollar store)
- Blank Hank of wool sock yarn (Knitpicks 3 years ago...)
- Jaquard Dyes (Knitpicks 3 years ago)
- White Vinegar ($1 at Fresh and Easy)
- Plastic Wrap ($1 at the Dollar Store)
- Steaming Pot ($5 at Goodwill)
- Globes (that I had at home)

STEP #2

Watch the tutorial video for dying sock blanks again:
http://www.knitpicks.com/tutorials/Sock_Blank_Dyeing__D108.html

The problem is, I don't have a sock blank, I have blank "Bare" skein. But it should work the same, right? right??...

STEP #3

Give the skein an hour bath to absorb water


STEP # 4

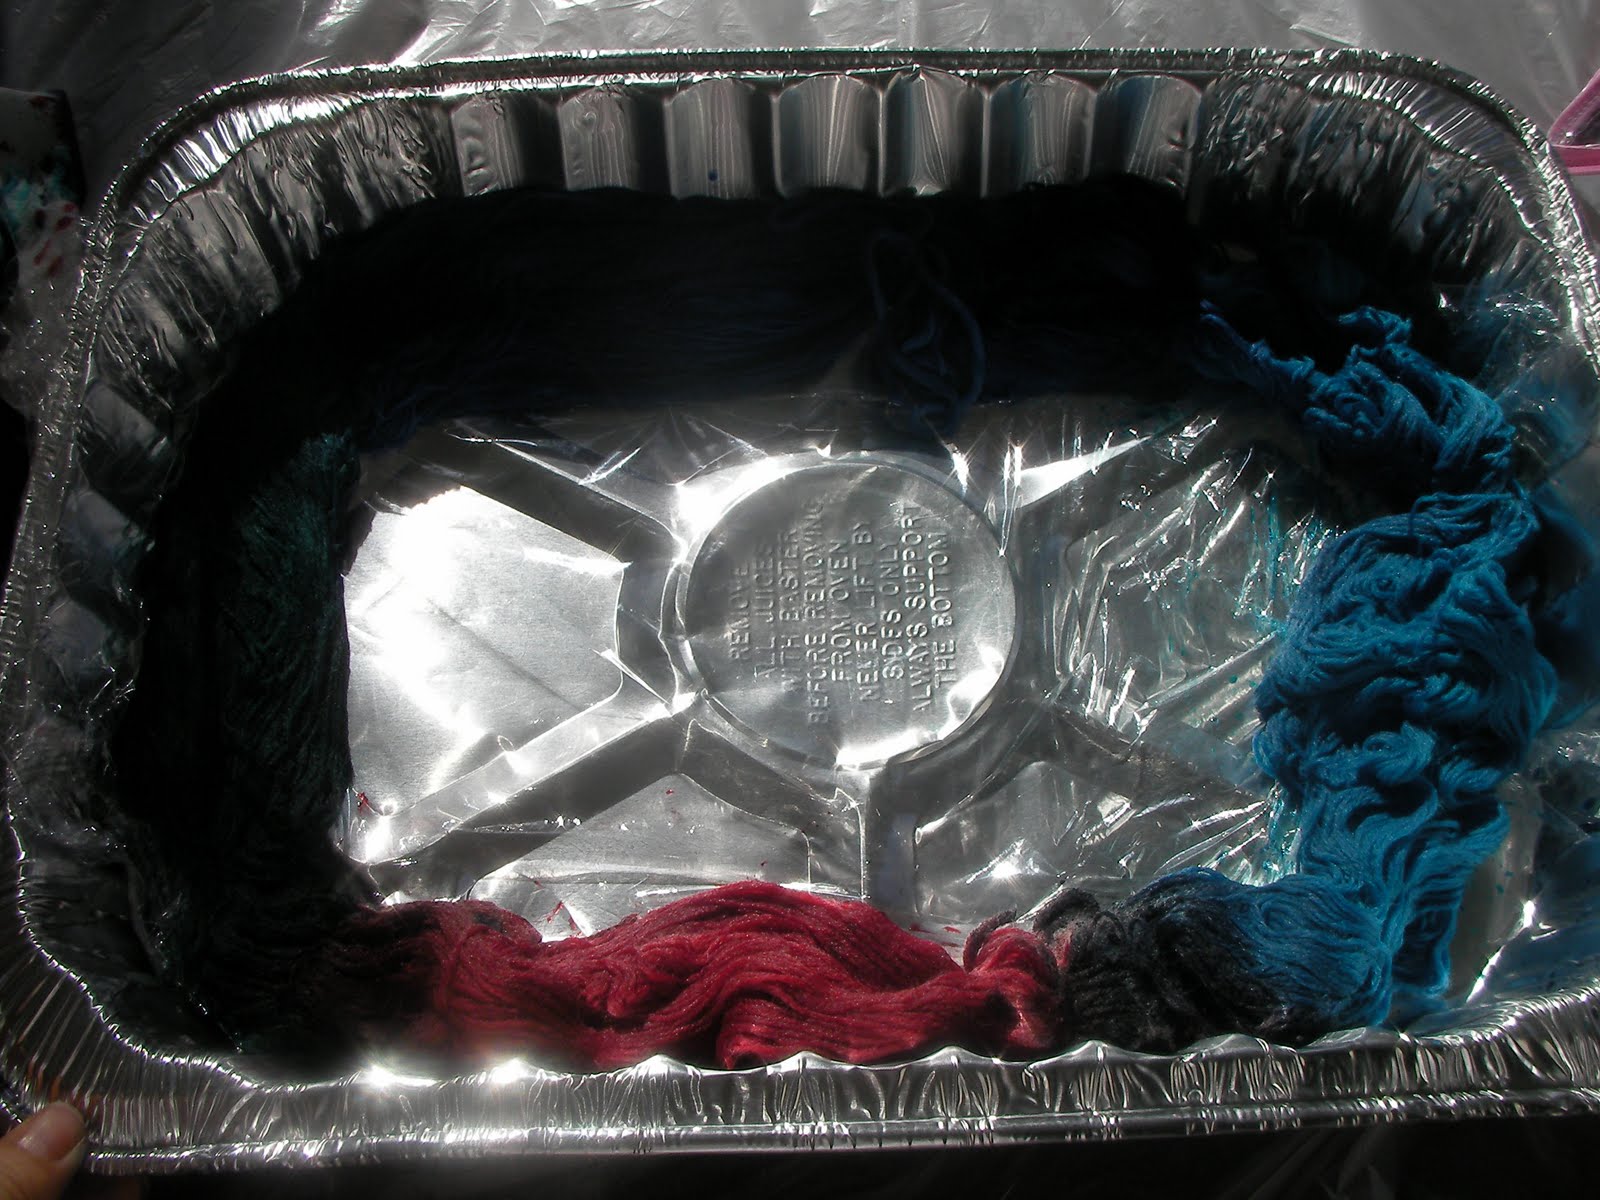
The most scary step... mix the dye...


Mix 1/2 teaspoon of dye with one cup of water in each jar. I have hot pink, charchuse, Lilac and Teal.

Each time I switch color I wiped the measuring teaspoon with baby wipes. I discover something, the wippie will reveal to you the final color of the dye... Cool!


STEP #5

Get the yarn out of the water and pad it dry in a towel...

OK, this is where I found a major obstacle in what was supposed to be a fun afternoon dyeing yarn... The wet hank got tangled so bad, it was impossible to open it up or to figure out what was the beginning or the end. It was such a mess, and I got so frustrated that I pulled hard on the ends and made it even worse. Now, there is no use. I don't think I can salvage it. I went upstairs to my room and I grabbed another Knitpicks Bare Hank, this time I open it up BEFORE WASHING IT, very slowly and carefully. This is what I found: There are 2 ties in different sections. I could not figure out how to open those up in neat way for hand dying, but at least I could wind it in a ball. I think I could have just dye it like that if I wanted a varigated effect, but since I wanted stripes, I needed to open up the skein and make a ring with long strands of yarn. Besides after dying I would have to wind it anyways, so might as well do it now. So I began to wind my second skein of yarn:


3 Hours Later:


Time to take a brake... and go to bed very frustrated and tired!